


Every wheel thrown pot comes from a cylinder. Vases are tall thin ones and plates are short fat ones but they all begin as a cylinder.
The cylinder is drawn to the desired height and then shaping begins.Cindy demonstrates throwing a dinner plate with the perfect profile rib.
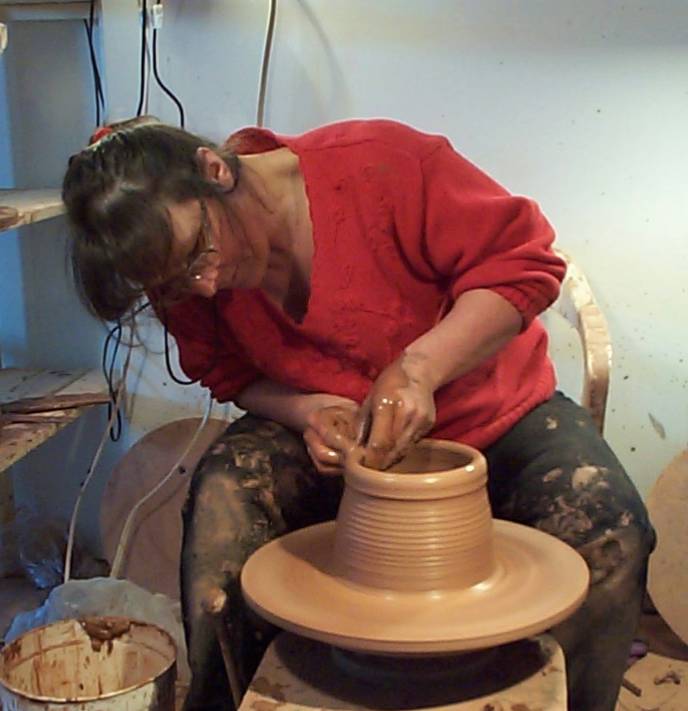
(Click for a larger image)
Here Cindy is throwing a large bowl.
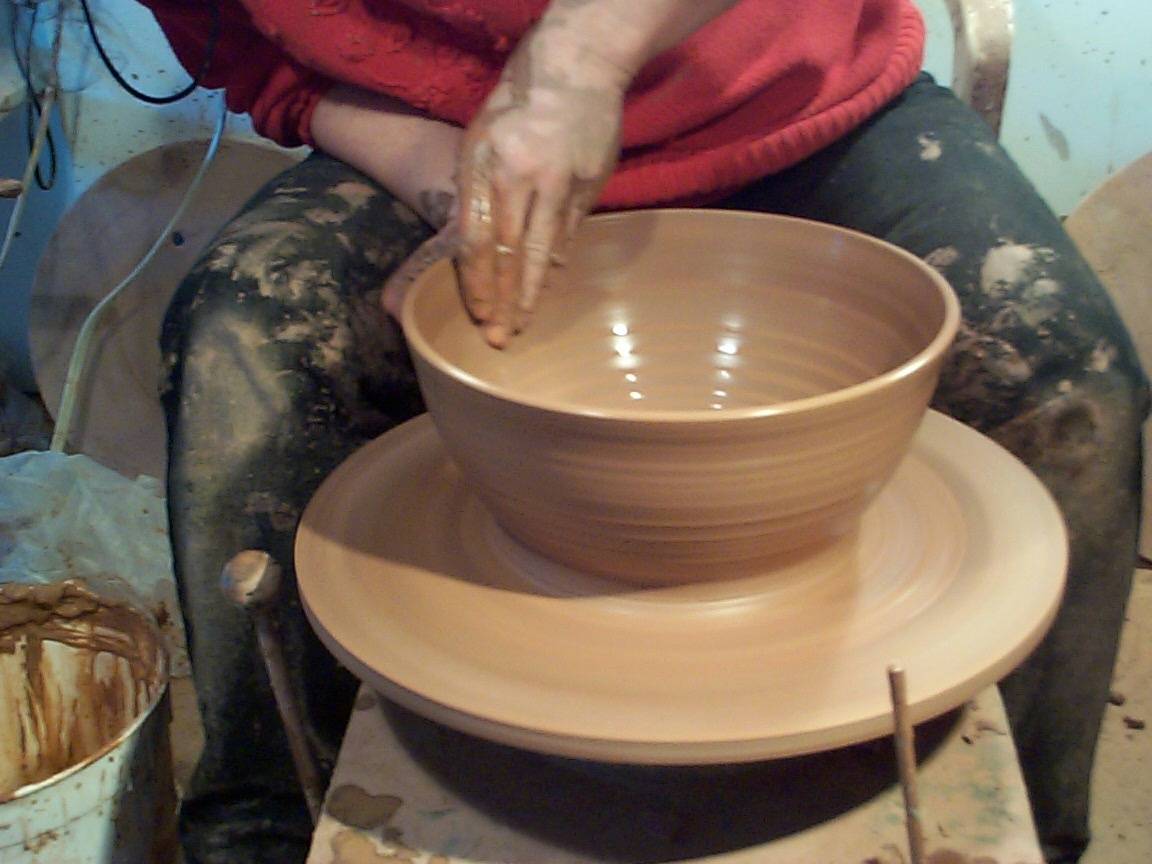
(Click for a larger image)
Excess water is removed from the bowl with a sponge which also
smoothes the
surface and contributes to the strength
of the finished bowl when it is in your kitchen environment.
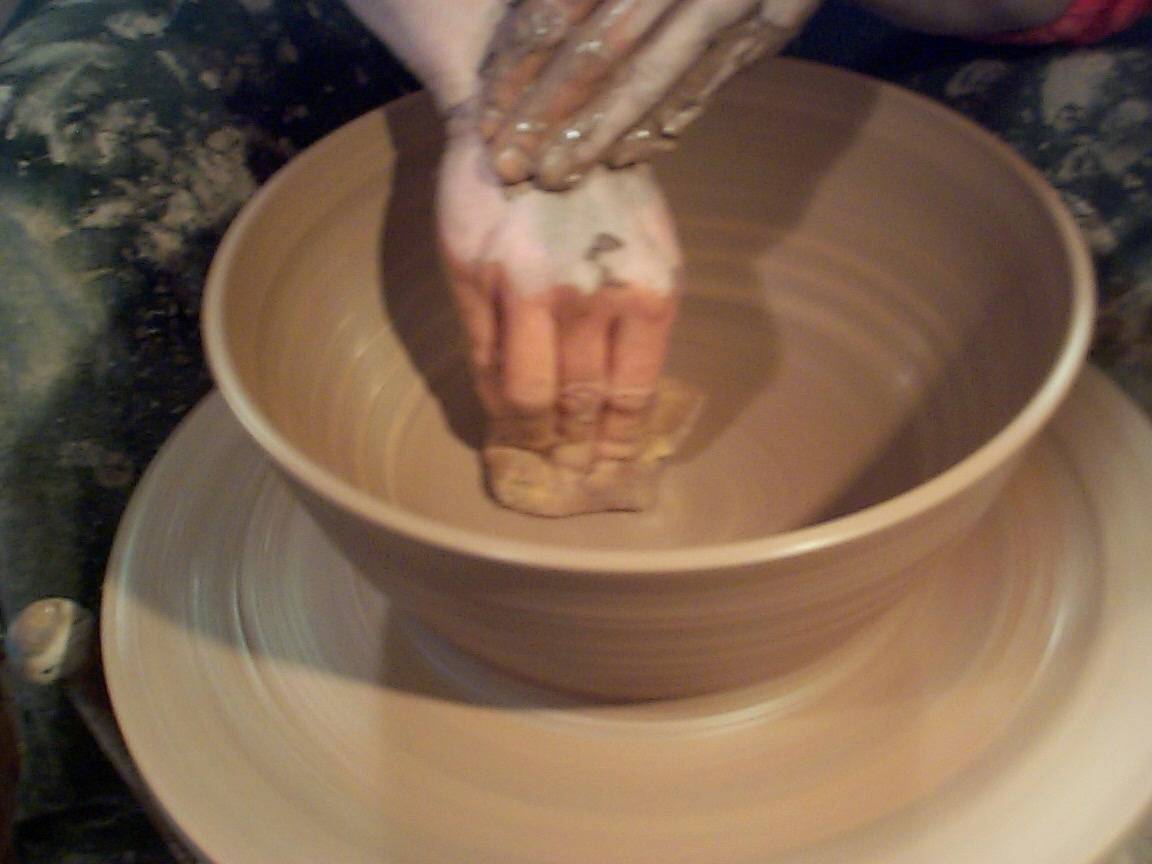
(Click for a larger image)
The freshly thrown bowl is then removed from the wheel and allowed to dry to a
"leather hard" state
at which point it can be trimmed to remove excess clay from the bottom and establish a foot.

(Click for a larger image)
Another method of throwing bowls is "Throwing off the Hump".
Cindy demonstrates trimming a bowl on the wheel.
Once the pot is trimmed it is again set on the shelf to dry. This will take several days for a bowl this size
as the drying rate must be carefully controlled to prevent cracking. We have found these bakers racks are
ideal for drying as they allow a uniform air flow around the pieces.
Plastic sheets enclose the shelves and are adjusted to control the drying rate.
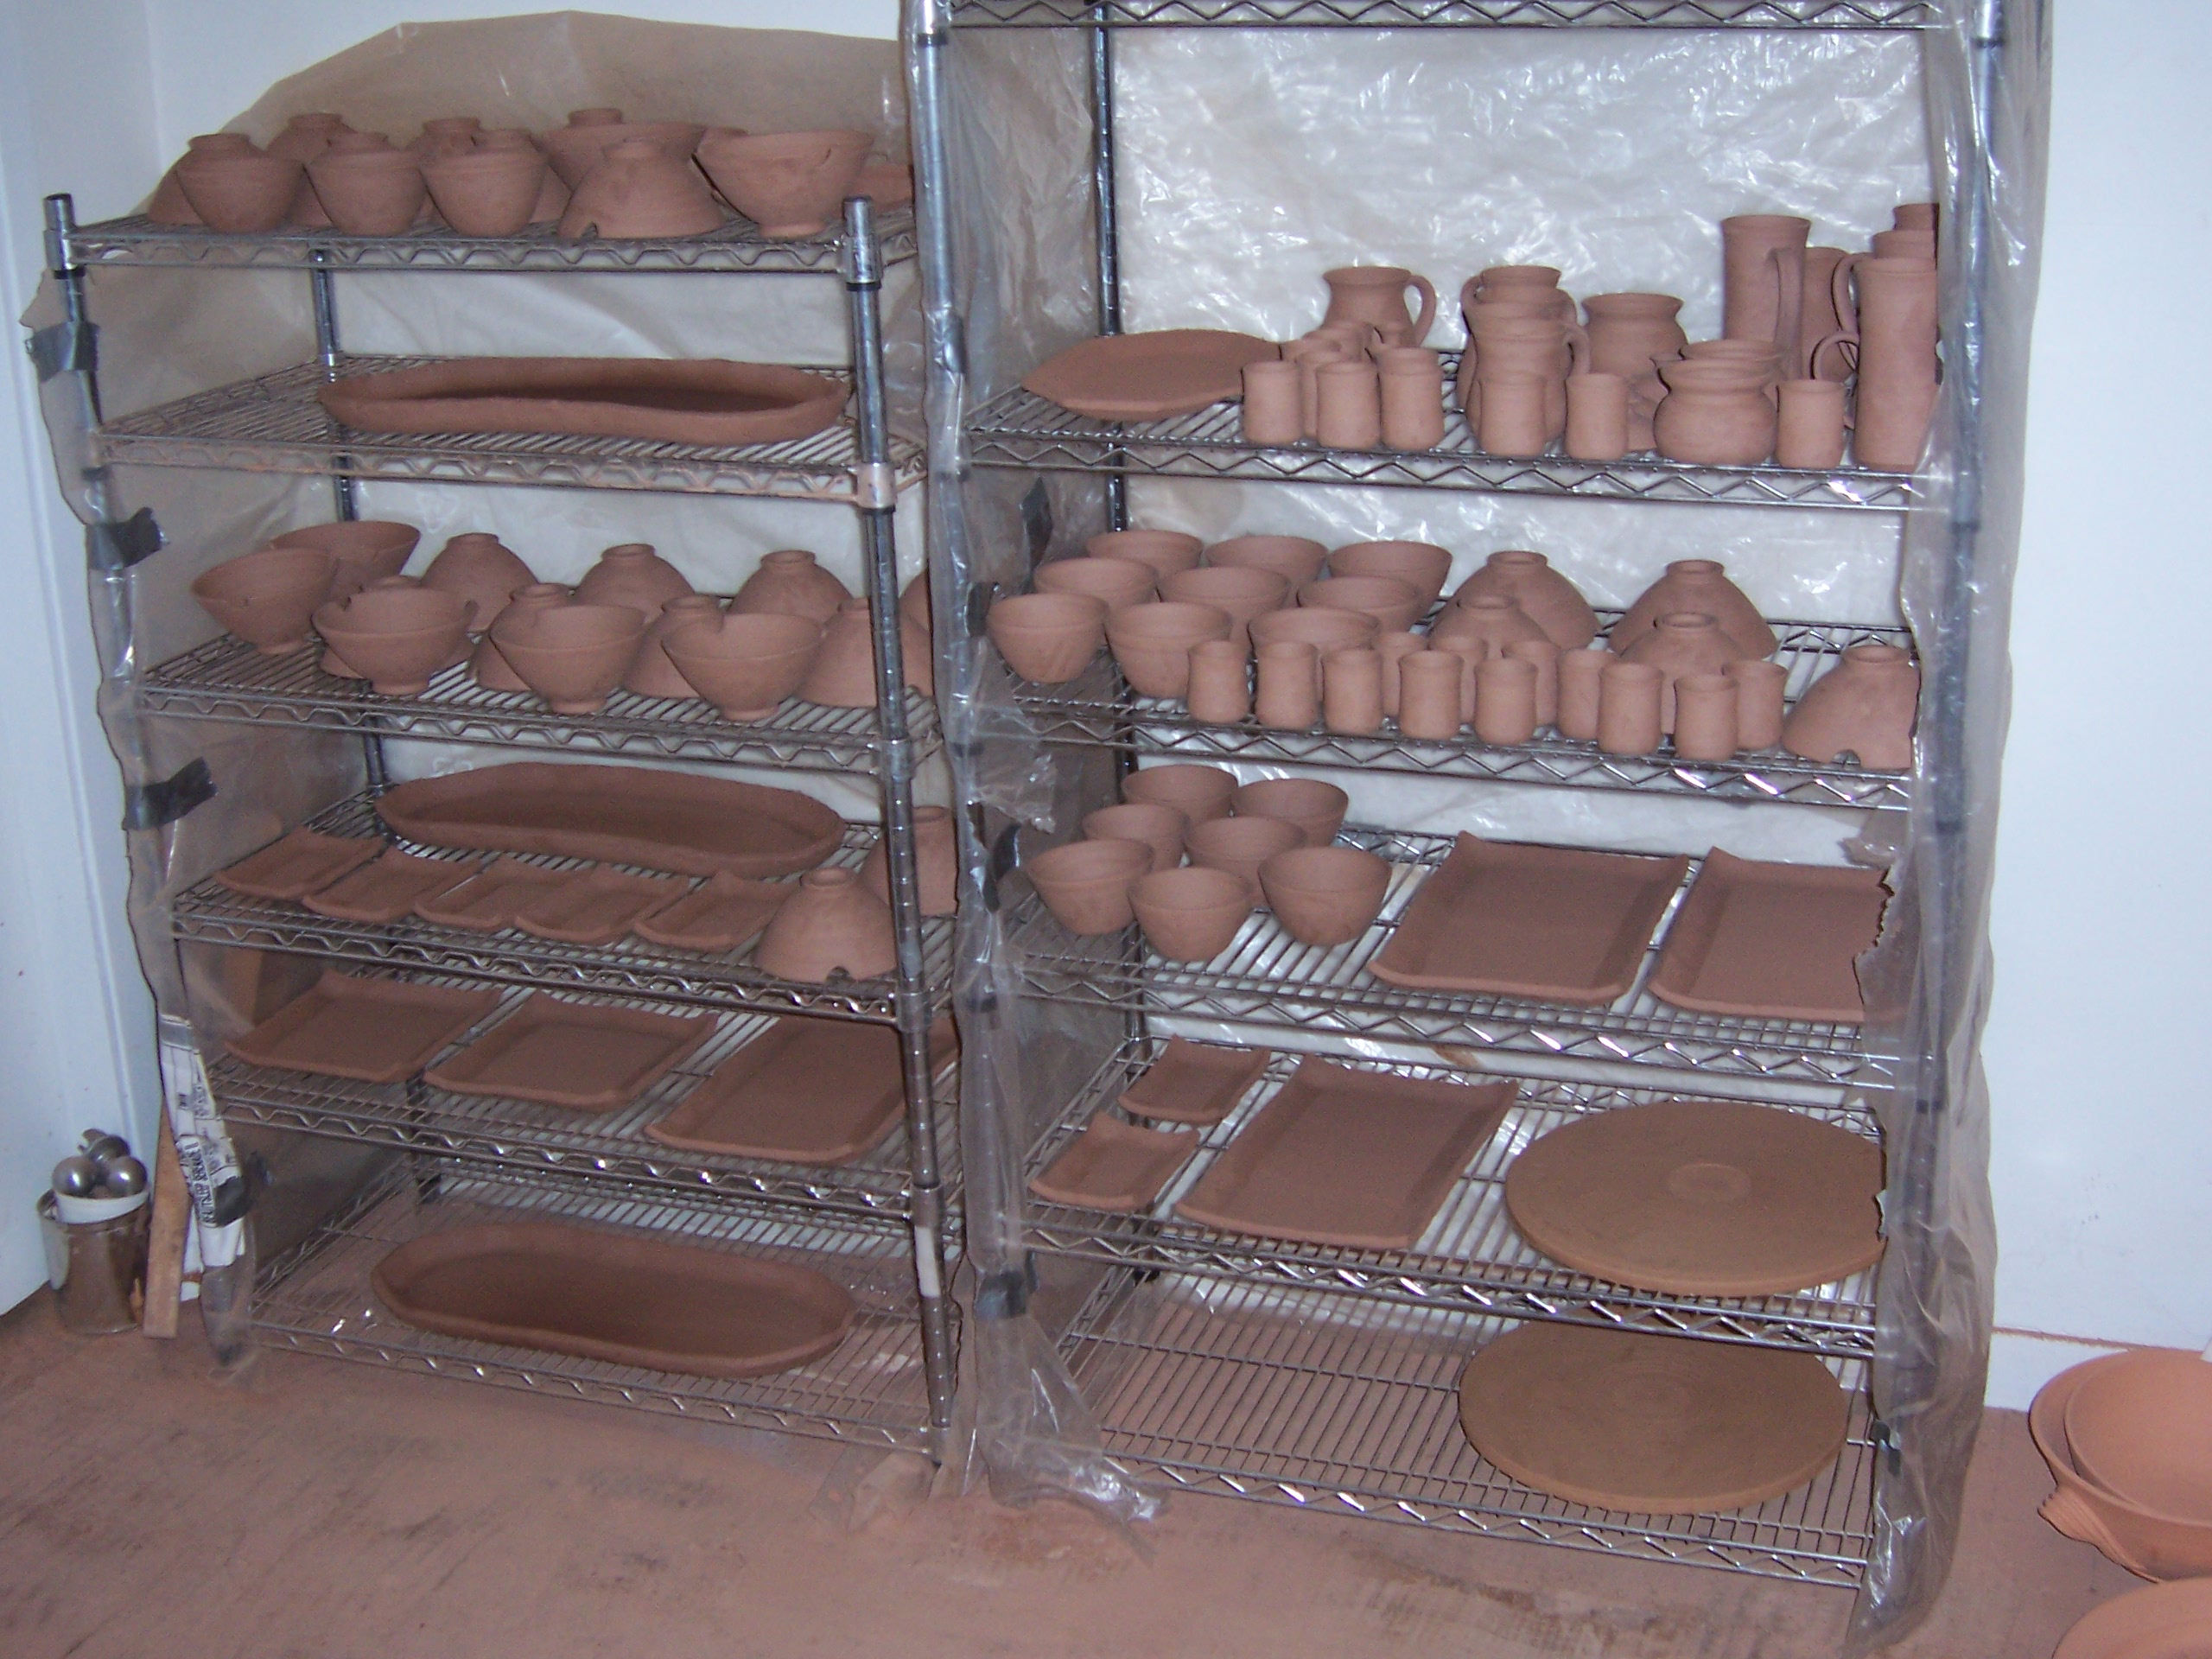
(Click for a larger image)