A Step by Step look at Making a Display Booth for Showing Pottery at a Wholesale, Craft, or Trade Show


  10 x 15 foot Show booth for Out of the Fire Studio, August 2005

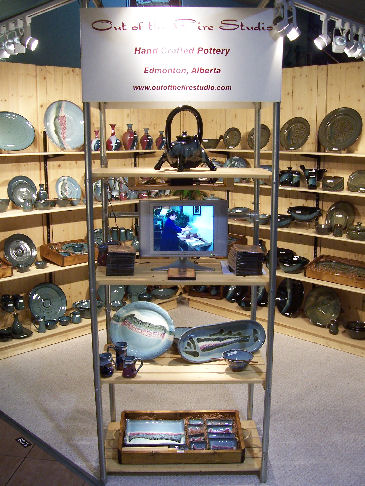
This display booth was created to answer several design requirements we noticed over the 6 plus years we attended craft, trade, and wholesale shows. The actual requirements made by show organizers vary greatly, so finding shelves or containers that work at every show is a difficult task. In order to build a booth that would allow us to meet the standards of most show organizers at shows we would realistically attend, we had to meet a set of design guidelines that encompassed them all. While the basic dimensions of a booth space might seem the same, even those may vary by three to six inches in actuality. For instance one show requires a hardwall system always, no exceptions. The booth must fit inside a ten by ten foot square and be no more than eight feet high. At another show the booth must fit inside the same space but an allowance must be made for curtains and rods already installed, so now a ten by ten booth is in reality only nine feet nine by nine feet nine. At other shows no hard walls are required at all. At the show which always requires hard walls, there is also a requirement for a three inch space at the bottom of the wall to allow access to electrical connections behind the booth. Some shows provide carpet, some do not. Some shows are dark shows, some are not. We thought about it for some time.

First a History Lesson!(Or How We Learned What NOT to Do)

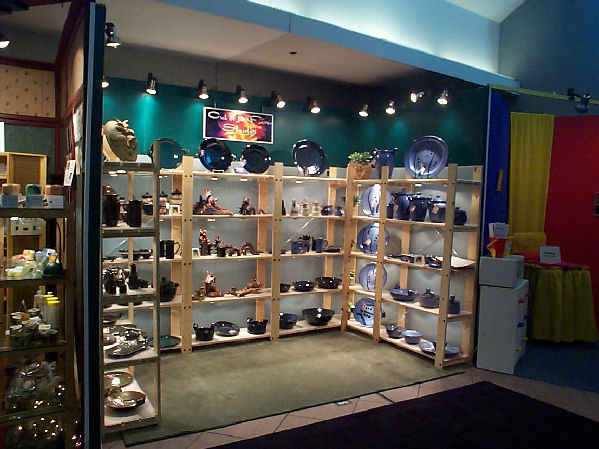
Our first booth was a flimsy corrugated plastic affair(Coroplast) on 2 x 2 framing. It was very light but also very hard to keep straight and plumb. Also the plastic changed size quite a bit when moving from very cold places to warm places so it was continually warping and coming unglued. We also were still learning about colour and decided we wanted to stand out so we used a very strong green colour for the walls. Not only did this "swallow" the lighting, but some of our glazes did not show well against the green background.

Our first shelving units in 2001 were metal and then we switched to wood in 2002.

Clicking on a "thumbnail" picture will give you a larger image.

Metal shelves and dark green corrugated plastic, 2002

We then put a sheet of white over the green and this helped a great deal with the lighting and the display. We used free standing wooden shelves with low voltage halogen lights underneath and clip lights with halogen spots on top of the walls. 
6' x 10' booth from 2003
We had the opportunity to switch to a cornerbooth and we decided we wanted to always show in corner booths because of the much better traffic flow. This meant that we would loose some wall space and potential shelf space, but we could compensate some by adding a "tower" in the corner.
10 x 10 Corner Booth Aug 2003
The end for this booth came after a retail show when we took a really good look at our booth and saw it as it really was. It never came back into the studio. It was time for a clean sheet of paper.


The Plan

I decided to make the shelving part of the booth walls. This would give us the maximum amount of shelf and floor space. I also decided to use wall mounted shelves with no front supports for maximum product visibility. The unwritten rule when showing pottery is the more light the better. I decided to use track lighting because it is almost infinitely adjustable and gives the capability to have a large number of lighting units in a relatively small space.

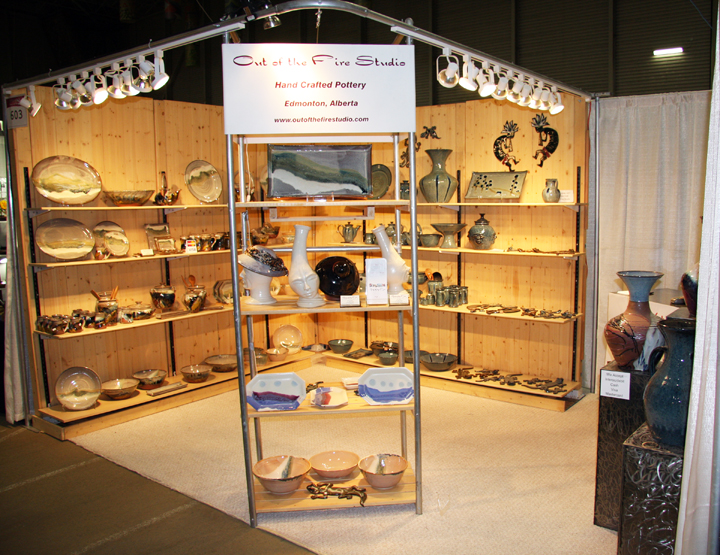
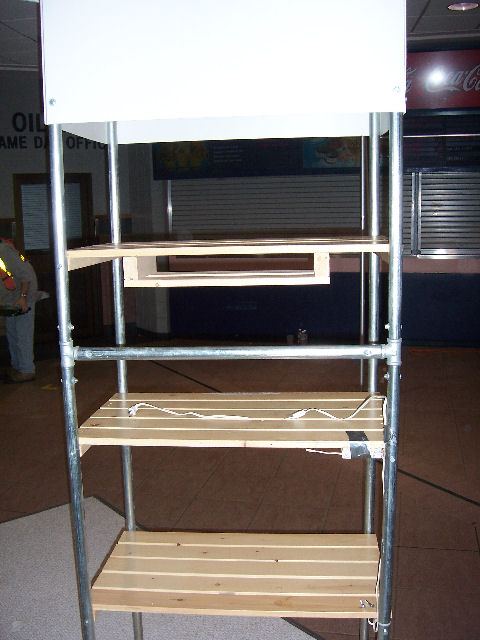
I wanted to have a booth that would break down in to fairly small components so that it could all be loaded into a van or trailer, use only one or at the most two wrenches, and be set up by one person if the need should arise. (The ten by ten booth and product will fit in a standard size Savana van with room for driver and passenger) It must be solid and secure enough when erected that it would be totally self supporting, and capable of holding and displaying literally a half ton or more of pottery.

Finally, I wanted to use readily available, economical, materials which would complement the pottery display, not detract from it in any way, So step two was a visit to the local "big box" hardware and lumber store. Unlike using equipment leasing to display our pottery we were able to have a lot more control that would maximize the impact.

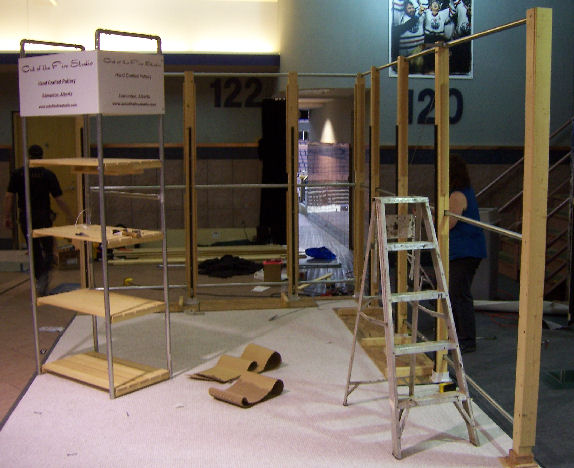
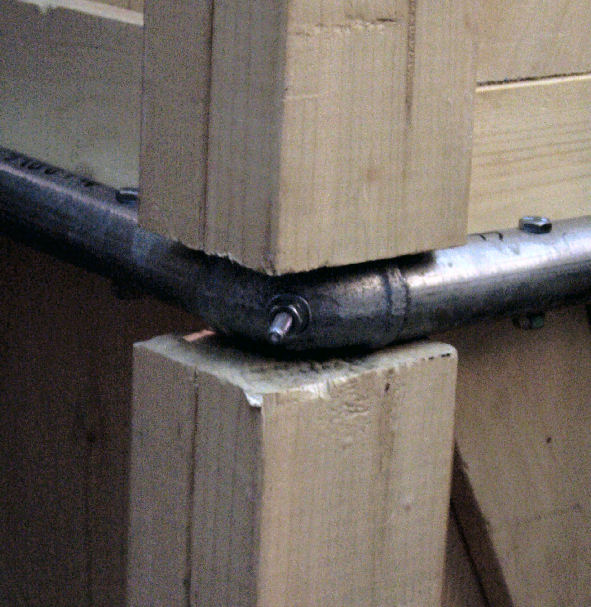
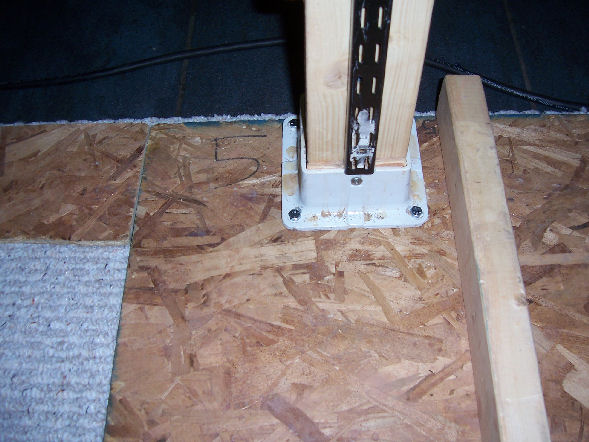
I decided to use a "post and panel" construction. The posts would directly support the shelving brackets, three per eight foot shelf, and indirectly hold up the panels made from 3/16" x 4" tongue and groove decorative strips which would give the appearance of solid walls. I looked at and discarded the idea of using eight foot 4 x 4 fence posts. I could not find any that were straight enough to begin with, and they were bound to warp over time. I settled on making posts from two 2 x 4's. Screwed together every few inches these have shown no tendency to warp and they fit in the same socket type brackets the 4 x 4's would have used with a couple of small shims.

Detail of the double 2 x 4 Post in a base "socket" bracket
For horizontal support I used chain link fence pipe and just cut a slot in one 2 x 4 for the pipe to fit through, then secured the post to the pipe with a 1/4" bolt.
Chain link fence pipe secured to post with 1/4" carriage bolt
These pipes come in 10 foot 6 inch sections, they are relatively light weight, galvanized, and their inner diameter is just right to fit over a 3/4" pipe nipple. At every corner I used two six inch nipples plus a 90 degree elbow , all galvanized. To secure them together and to the posts I drilled 5/16" holes and utilized 1/4" bolts to fasten everything together.
3/4" galvanized 90 degree elbow with two 6 inch nipples secured by 1/4" bolts
The post socket brackets are bolted to 5/16" particle board cut to come out just under the edge of the bottom shelf, and 2 x 3 braces are wood screwed to the particle board for added rigidity. After I fully assembled the booth for the first time I numbered and marked every pipe and piece of wood so that each time I reassembled the booth the same pieces went together. This ensured rapid trouble free assembly.
Floor support detail
The fourth, outside corner, is supported by the tower.
The Tower
To build this tower I utilized an IKEA™ wooden shelving unit and substituted a frame built from chain link fence pipe and 3/4" pipe fittings . For additional stability I added one cross brace at the rear.The tower is kept assembled so all nuts on the bolts are Nylok to prevent loosening.
Tower back view with Crossbrace
Where the pipes met at the top of the tower I used a 1 1/8" conduit elbow to form a smooth bend. It fits over the chain link pipes and is through bolted on each end.
Front top corner

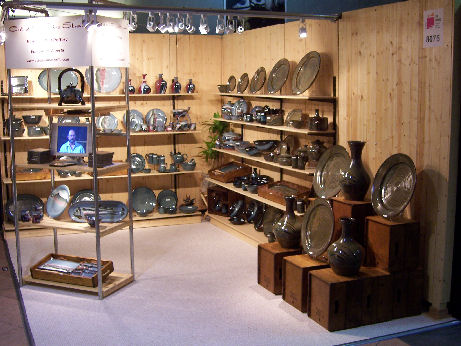
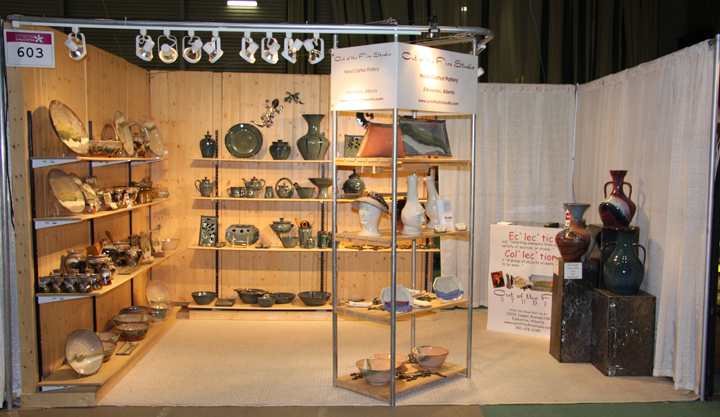
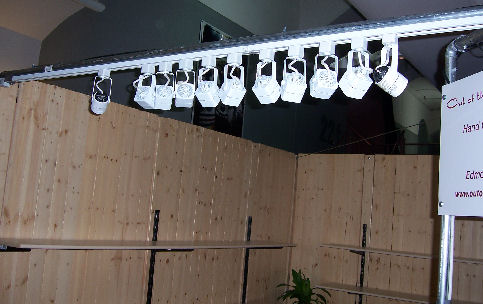
Under the shelves I mounted kitchen cupboard type low voltage halogen "puck lights". Power for these is provided by an extension cord run across one of the side pipes and plugged in with the track lighting.

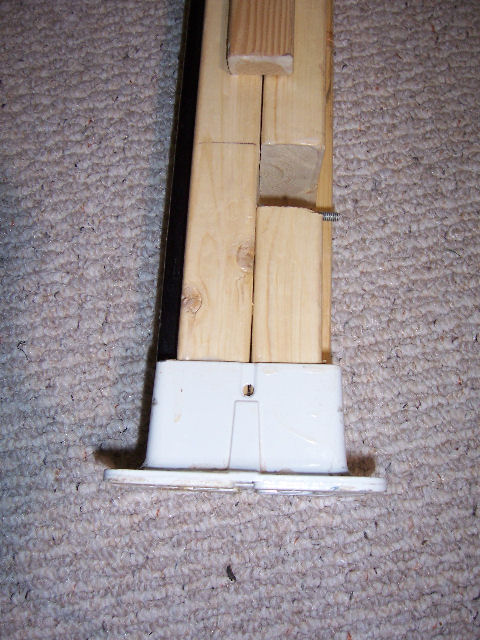
For added adjustability and stability I made up two aircraft cable lines with turnbuckles and ran one across the diagonal from the tower to the corner.

turnbuckle from top outside corner

The other was mounted from the bottom of the inside corner to the top of one of the walls. Once the booth is set up , I use a bubble level on the corner posts and tower and make a few turnbuckle adjustments until everything is exactly square.

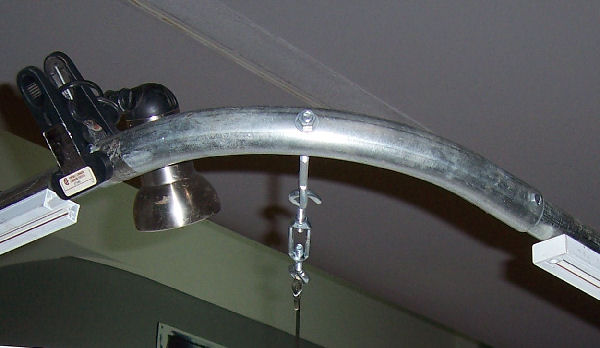
With the two support pipes from the walls to the tower mounting track lighting was a snap. I simply drilled the pipes and mounted eight feet of track under each one.

Track lighting under pipe

Here is one very important Electrical Safety Consideration. I also made up two extension cords with GFI (Ground Fault Interrupter) protection. Everything electrical in the display is connected to one or the other of these cords. This way should there ever be an electrical short, the power will be instantaneously disconnected and no one touching the tower will get shocked.

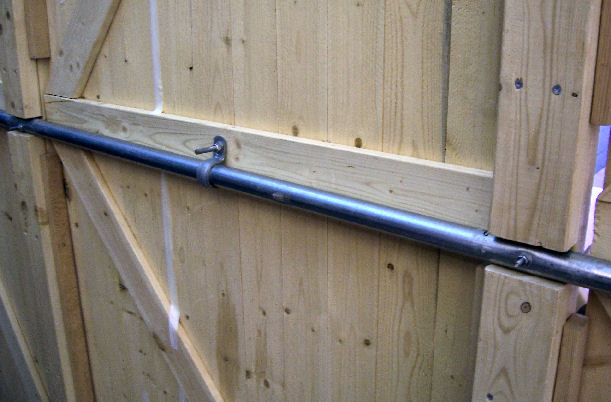
The side panels are hung over the pipes with garage utility hooks, strips of  1" trim support the backs of the panels above and below the center pipe, and then a single bolt with a conduit clamp is tightened to the center horizontal pipe. This removes any warped appearance and provides a final measure of stability and strength.

Conduit clamp and wooden stability strips
This display was used for seven shows with no modification, other than the addition of a five foot extension to one wall for the last Wholesale Gift Show when we decided we needed a 10' x 15' display space. As we were not using shelves in this section I just cut three 5 foot pipes, built one extra post and a new 54" panel and extended the wall.

Booth with no panels showing 5 foot extension


Completed booth with panels
And there you have it, that is the way we did it. Hopefully this will help you to plan and build your own display with a little less trouble.
A Footnote
After a three year break from doing shows we decided to try another retail show to publicize our new business location and the fact we were the only operating retail pottery studio/gallery in the city. We dug the booth out of the garage, brushed off the cobwebs and dust, and set up for the show.I had to replace the two front pipes and lighting tracks as we had used them elsewhere, but everything else was original.We found ourselves with a 15 foot by ten foot bay type space instead of a corner. Here are some pictures of what we did. Proof that the design is solid and will stand the test of time, moreso than our retail business. This show was the beginning of May 2008 and at the end of June we were forced to close the store. We attended theButterdome Spring show the first weekend in May, 2009 and again at the Christmas Butterdome Sale December 3 - 6 2009. Same booth construction except the organizers threw us a curve for the Christmas sale and reversed the corner. This meant we had to run the fifteen foot extension in the other direction. It added about two hours to set up time for me to make the necessary modifications. I didn't get any images but trust me, it worked fine! We have now disposed of the booth and use only the corner tower for display at The Edmonton Folk Festival. The design proved very durable and you could do worse than to integrate some of the features into your own display.

Ten by ten booth in a fifteen foot space May 2008


Corner booth set up in a U bay space May2008